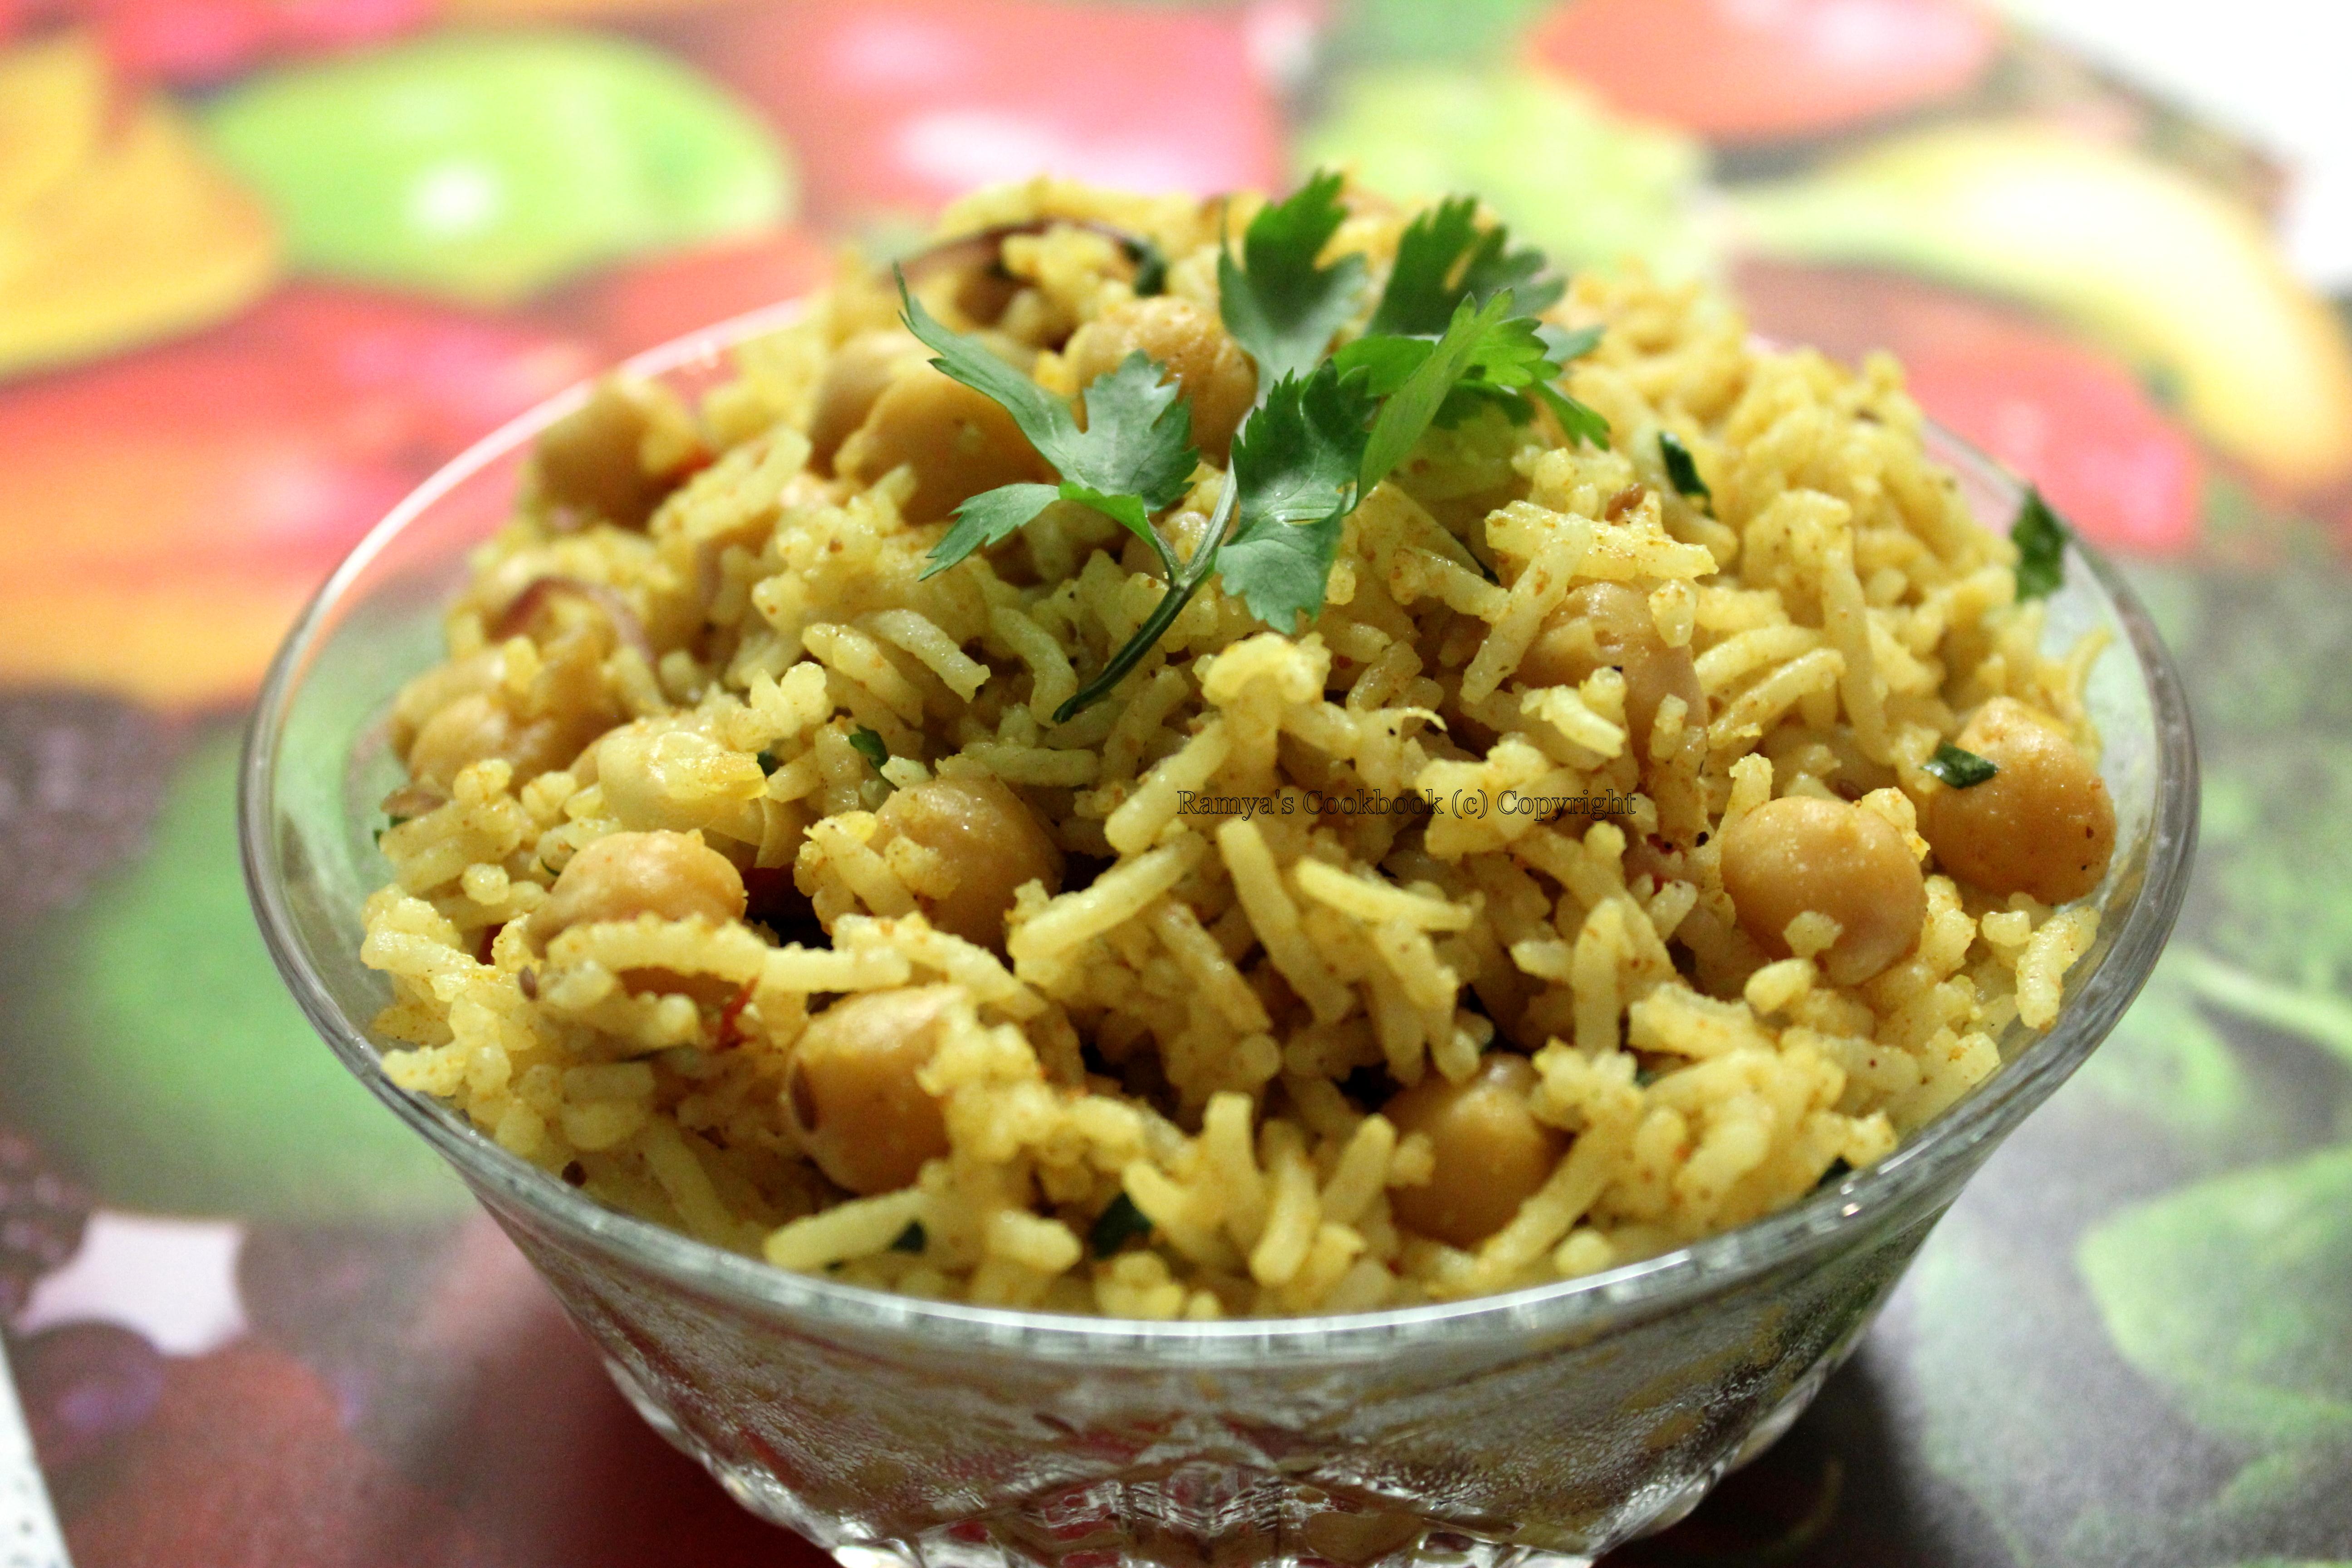
Tuesday, August 13, 2013

Chole Pulao - Chickpeas Rice

The credits for this recipe has to go to my Husband. He comes up with these new ideas when he is bored of eating the same stuff again and again and I have to find a way to execute them. By the time Friday comes I'm hunting for vegetables in the refrigerator (and I'm too lazy to go grocery shopping on Fridays!). I kept asking my husband to  suggest something and he came up with this...Chole Pulao. It was an experimental recipe meant to be tried only on my sweet Hubby, but since it turned out so good I'm sharing with you all! ;) Go ahead and try it out!! This one's quick and easy..I promise!

Chole Pulao

Ingredients:

  • Chole/chickpeas - 1 cup, soaked for atleast 5-6 hrs
  • Basmati Rice - 2 cups, cooked (it is best if rice grains are not sticking to each other)*
  • Onion - 1 medium, thinly sliced
  • Tomato - 1 big, finely chopped
  • Jeera/cumin seeds - 1-2 tsp
  • Turmeric - 1 tsp
  • Ginger Garlic paste - 2 tsp
  • Kitchen King Masala - 2 tbsp*
  • Salt - to taste
  • Cilantro - to garnish
  • Lemon juice - to taste
  • Cooking oil - 2 Tbsp
Procedure:
  • Cook the chickpeas in pressure cooker for not more than 2 whistles. We don't want the chickpeas to be too soft.
  • In a frying pan/kadhai, add oil.
  • Once oil has heated up, add cumin seeds and let it splutter. Add turmeric and ginger-garlic paste.
  • Now add onion slices and sauté for a few mins until the onions turn translucent.
  • Add tomato and sauté until the raw aroma of tomato disappears.
  • Add the cooked chickpeas and Kitchen King masala and mix well. Make sure you don't break the chickpeas.
  • Add salt and cooked rice and mix thoroughly.
  • Take off the stove and add a dash of lemon juice.
  • Garish with cilantro and serve hot with raita.

*Note:
  • You can cook rice in an electric cooker or microwave to make sure grains are separate.
  • If cooking in pressure cooker, soak the basmati rice for 10 mins in water and then cook. Adding very little oil/ghee makes them cook separately.
  • You can use any variety of rice instead of Basmati rice.
  • You can use Garam Masala instead of Kitchen King Masala.

 Follow me also on my new blog address here.


Thursday, August 1, 2013

Bendekayi Gojju - Okra in Coconut Gravy

My Amma is an expert at these. The variety of huLi, gojju and palyas she makes is endless. Bendekayi gojju is one of the gojjus she makes very frequently(and needless to say it is her recipe I'm sharing here). I love bendekayi (okra) for its unique taste. It blends really well into South Indian cuisine as it does with North Indian.
Some people hesitate to use this veggie due to its sliminess when cut and sautéed. And the science behind it is a little complex. But if you're like me you'd love to know! Just like aloe vera, the leaves and pods of Okra produce a slimy substance known as mucilage. It

's viscosity increases when heat is applied. So that's why it's a messy deal to cut and cook Okra. But the good part of it is that okra is rich in vitamin K and C which is good for you! And leaving aside all the boring nutrition facts, this gojju is as delicious as it can get. So go ahead and give it a try for all the healthy and tasty reasons! ;)


Ingredients:
  • Bendekayi/ Okra - 15-20 okras, cut into 1/2 inch pieces. Use fresh ones whenever possible. Can use frozen too.
  • Cooking oil - 2-3 tbsp
  • Curry leaves - 2-3 leaves
  • Tamarind/ tamarind paste - rinse a golf ball sized tamarind in half a cup of warm water and squeeze out the pulp and use. If using tamarind paste, use about 2 tbsp.
  • Jaggery - 1 tbspFor the masala to grind:
  • Fresh/frozen Coconut - grated, 3/4 of a cup
  • Uddina bele/urad dal - 1 tbsp
  • Kadle bele/channa dal - 1 tbsp
  • Byadagi mensinakayi/ red chillies - about 2-3 (or depending on your spice level)
  • Mustard seeds - 2 tsp
  • Ingu/heeng/asafetida - a pinch
  • Methi seeds - 1 tsp
  • Palya pudi/ vangibath powder - 1-2 tbsp(depending on your spice level)
  • Salt - as needed
Procedure:
  • In a frying pan/wok, pour the oil and add the cut up okra pieces and curry leaves.
  • Sauté the okra on high flame for 6-8 mins. Make sure you don't char them.
20130731-000750.jpg

  • The Okra will look slimy, but continue to sauté and it will reduce.
  • Turn down the flame and add the tamarind pulp to the okra. If you are using tamarind paste, mix it with a little water and pour over the okra.
  • Add jaggery at this point and continue cooking.
20130731-000804.jpg

  • Meanwhile in another pan, dry roast the ingredients under masala except for coconut.
20130731-000757.jpg

  • Grind the dry roasted masala with coconut to a chutney like consistency. Use water for grinding as needed.
  • Add the ground masala to the okra and mix well. Add water to adjust consistency.
20130731-000857.jpg

  • Add salt according to your taste. Cook for 4-5 mins and serve hot.
Notes:
  • To reduce the sliminess, pat dry the okra with paper/kitchen towel after washing them but before cutting them.
  • The gojju tastes best with rice, it makes a great side with roti/chapati/phulkas too.

Nuchinunde - Steamed Lentil/Dal Dumplings

This is an authentic Karnataka breakfast/brunch/lunch item. It's loaded with proteins because of the dals. My Amma would make this on Nagarapanchami (without the onions, ofcourse!). I'd never eaten it then thinking it was boring food. For a long time, she never made it on any other day too. One Saturday, Appa insisted he wanted Nuchinunde and so Amma had to make it the next day. She added onions to it since it was no festive day. The onions give that special taste to it and that did the trick. I started loving these yummy and nutritious dumplings from then! Like my Appa, I suddenly started craving for nuchinunde one rainy day. It was also a potluck in a friends place and I was wondering what I could take that was different and unique. All I had to do was call Amma for the recipe and realized it is so very simple to make. I could not take a picture of the steamed nuchinunde because I took it the potluck and it was over in minutes. I promise I will post a picture the next time I make it(I'm pretty sure I will be making it very soon!).

Ingredients:
  • Togari bele/Toor dal - 1 cup, soaked overnight
  • Kadle bele/ Channa Dal - a little less than half a cup, soaked overnight along with Toor dal
  • Onion - 1, finely chopped
  • Ginger - 1 inch, grated
  • Cilantro - a few sprigs, chopped
  • Black pepper and cumin powder - powder both together, 1/2 tbsp
  • Green chillies - about 5(depending on spice level needed)
  • Salt - to taste
  • Coconut - 2 Tbsp, small pieces (I ran out of coconut pieces, so I added grated coconut)
Procedure:
  • Carefully pour out as much water as possible from the toor dal and channa dal.
  • Grind the dals together without adding any water. Make sure you grind it to a coarse consistency and NOT a smooth paste.
20130727-111648.jpg
  • To the ground dal, add finely chopped onion, coconut, green chillies, ginger, black pepper and cumin powder, cilantro and salt.
20130729-183455.jpg
  • Mix all the ingredients well.
  • Make small golf sized balls(as shown here) and place them in greased idly plates.
20130729-183727.jpg
  • Place the idly stand in a pressure cooker and cook in steam for about 10-12 min.
  • Remove the nuchinunde from the idly plates and serve hot with coconut chutney.
20130729-183737.jpg

Friday, July 19, 2013

Microwave Doodh Peda

Back in the 90s, any relative coming home would definitely bring me banana chips, Sapota (Chikoo) fruit and Nandini Doodh Peda! All my favorite things!! Although I have never been a big fan of sweets, Nandini Doodh Peda had just enough sweet for my taste.

My Mom makes Doodh Peda using a traditional recipe (takes too much time and patience), but I'm too lazy for it. My Mother-in-law had this recipe for a quick and easy Doodh Peda. Five simple ingredients and less than 5 minutes is all you need for this one!


Ingredients:
  • Instant Dry Milk/Milk Powder (low fat) - 2 cups
  • Condensed milk(sweetened and fat free) - 1 can (14oz)
  • Ghee - 2 Tbsp (can use butter too)
  • Cardamom/Elaichi powder - 1 tsp
  • Cut Almond pieces - a few (for garnishing)

Procedure:
  • Grease a plate with a little ghee and keep it aside.
  • Take the rest of the ghee in a microwave safe bowl.
  • To this, add the condensed milk and milk powder little by little and mix thoroughly.
  • Once the mixture gets a uniform consistency, place it on high in the microwave for 1 minute.
  • Take out the bowl and give it a good mix and put it back in the microwave for another minute.
  • Repeat above steps one more time.
  • Add cardamom powder to the mixture and let it cool.
  • When the mixture is warm enough to handle with your bare hands, apply some ghee to your hands and make small balls.
  • Press the center of the peda with some cut almonds and place it on the greased plate.


Friday, July 12, 2013

Aloo (potato) palya

This is a super simple recipe. It can be used in many dishes like masala dosa, aloo buns, sandwiches or can be served as a side with rice/rotis.

Ingredients:
  • Potatoes - 3 medium sized
  • Onion - 1 medium sized, chopped
  • Green chillies - 3, chopped (depending on how spicy you want it to be)
  • Curry leaves - a few
  • Mustard seeds - 1 tsp
  • Turmeric powder - 1/4 tsp
  • Asafoetida/heeng - a pinch
  • Salt - to taste
  • Vegetable oil - 1 tbsp
  • Cilantro - to garnish
Procedure:
  • Peel the potatoes and cook them in a pressure cooker with sufficient water.
  • Once cool, mash the potatoes and keep it aside.
  • In a wok/kadhai, pour in the oil. Once the oil is hot enough, add the mustard seeds.
  • As soon as the mustard seeds splutter, add the turmeric powder, asafoetida, curry leaves, green chillies and chopped onion.
  • Saute for a few mins until the onions turn translucent.
  • Add the mashed potatoes and salt and mix well.
  • Garnish with cilantro.

Low Fat Aloo (Potato) Buns

Bangalore. On a typical rainy monsoon day. Iyengar bakery. What do all these remind you of? Yes, Iyengar bakery special...Aloo Bun!! Every Saturday my parents would go to buy vegetables for the week and on their way back home was an Iyengar bakery. They would get an Aloo bun and a honey cake for me from there. Oh, how I miss those days! My mouth is watering and I am a little teary eyed at the same time thinking of it.

I learnt this recipe from various sources including a friend who runs a bakery! I love the fact that it needs so little oil, no eggs, no butter at all. So here it is for you to try.


Ingredients:

For the bun crust -
  • All purpose flour (APF)/maida - 3 cups
  • Sugar - 1 tbsp
  • Salt -  3/4 tsp
  • Yeast - 2 & 1/2 tbsp (I used active dry type)
  • Milk - 1/4 cup + 1tbsp (for brushing on top)
  • Vegetable/Olive oil - 3 tbsp
  • Water - as needed
For the potato filling/aloo palya -
  • Potatoes - 3 medium sized
  • Onion - 1 medium sized
  • Green chillies - 3, chopped
  • Curry leaves - a few
  • Turmeric powder - 1/4 tsp
  • Asafoetida/Heeng - a pinch
  • Salt - to taste
  • Mustard seeds - 1 tsp
  • Vegetable/Olive oil - 1 tbsp
  • Cilantro - to garnish
Procedure:
  • Heat up the milk to lukewarm temperature. If the milk is too hot, the yeast will be killed.
  • Add the sugar, salt and yeast to the milk and mix well.
  • Take the flour in a mixing bowl. Add oil, above mixture and water to the flour and knead well. This dough will not be like chapati/roti dough. It might be a little sticky and it's ok that way.
  • Cover the dough with food wrap for an hour.
  • In the meantime, prepare the potato filling using the recipe here.
  • Let the filling cool down, then divide it into 8 equal parts.
  • In an hour, the dough should have raised well and doubled in size (almost).
  • Preheat the oven to 200 degree C.
  • Knead the dough softly again and make 8 equal sized balls.
  • Take each ball in hand, press slightly. Place a part of the potato filling in it and fold in the dough from all sides.
  • Place each bun (with the folded side facing down) on a well greased baking tray.
  • Mix 1 tbsp of milk with little oil. Brush each bun with this mixture.
  • Keep the baking tray in the oven and bake for 15-20 mins (approximately).
  • The buns are ready when you see the crust turning golden brown.
  • Enjoy the hot aloo/potato buns with your evening tea.


Tuesday, July 9, 2013

Mango icecream

Summer is here!!! Mangoes are the ideal treat for summer. Oh wait, icecream is too! Hmmm..how about a mango icecream so you get best of both the worlds? This recipe is inspired by the well known website www.showmethecurry.com , but with a slight twist. It's a very simple recipe.

Ingredients:

Ripe mango - 2 (or you can use a can of mango puree)
Non-fat sweetened condensed milk - 1 14oz can
Whipped cream - 1 box (I used cool whip, bring it close to room temperature before using in the recipe)
Cardamom powder - about 2 tsp
Saffron - a few strands
Pieces of mango - a few
Cashewnuts/almonds/pistachio - 2 tbsp (optional)

The mixture looks like this before going into the freezer.


Procedure:

  • Squeeze out the pulp from the mangoes and keep it aside. Skip this step if you are using mango puree.
  • Puree the pulp in a mixture so it gets a uniform texture.
  • In a big bowl, mix in the mango puree (from previous steps or the canned mango puree), condensed milk and whipped cream.
  • Give it a good mix so all three ingredients have blended well.
  • Throw in the cardamom powder and the saffron. Mix well.
  • Pour the mixture into a container with a lid and put it in the freezer for about an hour.
  • After an hour, mix the icecream lightly and add the mango pieces. You can also add in the nuts at this time.
  • Put it back in the freezer for a couple hours more.
  • Your mango icecream is ready to be served.
Pictures of the end product coming soon! :)

Instant chocolate cake - 2 minute cake in the microwave

This is the ultimate fix for that chocolate craving! One of my friends tried this out and posted a picture on Facebook and I couldn't resist trying it immediately. Instead of eating it in the mug itself, I gave it a little twist by taking it out and icing it with whipped cream. You can directly eat it from the mug. It actually tastes best when it is warm! Scoop some icecream on top of it and your yummy-licious fix for that sweet tooth is ready!


Ingredients:
  • A mug
  • Plain flour - 4 tbsp
  • Sugar - 4 tbsp
  • Baking powder - 1 tsp
  • Baking soda - less than 1/4 tsp
  • Dark cocoa powder - 1 1/2 tbsp 
  • Instant coffee powder - 1 tsp
  • Salt - a pinch
  • Cooking oil - 1 tbsp
  • Butter - a small piece (optional)
  • Milk - 3 tbsp
Procedure: 

  • Mix all the ingredients in the mug. Beat well until the batter looks thick and fluffy.
  • Place the mug in the microwave on high for about 2 minutes. All microwaves are different, so please adjust according to your microwave.
  • You should be able to see the mixture rising from the mug.
  • And that's it. Let it cool a little (yes, patience!).
As I mentioned earlier, I iced the cake with whipped cream and put it in the refrigerator for sometime before devouring it! You can eat right from the mug or with vanilla icecream.
To make it more interesting, throw in some nuts or choco chips into the batter.

Monday, July 8, 2013

Gojjavalakki - Tamarind flavored beaten rice

 Gojjavalakki (also called Huliavalakki) is a common, but delicious snack in South India, especially Karnataka. Mom would make it for breakfast many a times, but it always tasted the best on Janmashtami. The recipe is very simple and quick.
Ingredients:
·         Poha/Avalakki/Beaten rice (the thick variety) - 2 cups
·         Tamarind paste/extract- 2 tsp
·         Jaggery - 1 tbsp
·         Rasam Powder/Saarina pudi - 2 - 3 tsp
·         Peanuts - 1/4 cup
·         Vegetable oil - 2 tbsp
·         Urad Daal - 1 tsp
·         Chana Daal - 1 tsp
·         Red chillies - 2 (broken)
·         Mustard seeds - 1 - 2 tsp
·         Turmeric - a pinch
·         Asafoetida/Heeng - a pinch
·         Curry leaves - a few leaves (I use powdered curry leaves)
·         Cilantro/Coriander - a few strands, chopped
·         Grated coconut - 1 tsp
·         Salt - a pinch

Preparation time:
 20 - 30 mins

Procedure:
1.        In a pan, lightly heat the Poha (just until you feel the Poha is warm). Once it cools down, powder it in a blender. Make sure it remains coarse and not too powdery. Keep aside.
2.        Place a pan on the stove, add the tamarind extract, jaggery and 1/2 a cup of water. Mix thoroughly and let it be on the flame for 4-5 mins till the raw flavor of tamarind is gone. To this, add the rasam powder and mix well.
3.        Now, slowly add the powdered Poha into this mixture with slow stirring. Mix thoroughly so the tamarind mixture is incorporated well with Poha. Add salt as required. Sprinkle some water if you find the poha mixture is dry. Let it cook for 2-3 mins with occasional mixing.
4.        In another pan, heat vegetable oil. Add mustard seeds and let it splutter. Now add urad daal, chana daal, peanuts, turmeric, asafoetida, curry leaves and red chillies and fry till they are done. Add this seasoning to the poha mixture and mix well.
5.        Garnish with chopped cilantro and grated coconut. Serve hot.

Badnekayi Yennegayi - A North Karnataka Special

This recipe is my Aunt's specialty. Leela Aunty, as we fondly call her, has mastered the North Karnataka style of cooking very well. Be it the Bhaakris, the Badanekayi Yennegayi, the super hot mirchi bajjis or the Jhunka, her recipes are the best and they taste oh-so good! I'd like to thank her for teaching me this recipe. 
Ingredients: 
·         Eggplants: 5-8 Small/medium sized
·         Onions: 1 medium sized
·         Peanuts - 1 cup - roasted
·         Garlic - a few cloves
·         Vegetable Oil - 3-4 tbsp
·         Curry powder/Palyada pudi (can be replaced with Sambaar Powder and Red chilli powder) - 2 tbsp
·         Cilantro/Coriander - a small bunch
·         Coconut - 1/2 a cup - grated
·         Green chillies - 2-3
·         Tamarind - If you are using Tamarind paste, use 1/2 tsp; If you are using whole Tamarind, rinse a lemon sized piece of tamarind in warm water for 5-10 mins and use the extract. One can also use 2 medium sized tomatoes instead of tamarind (See Step 2 below)
·         Turmeric - A pinch
·         Jaggery - a very small piece (optional)
·         Mustard seeds - 1/2 tsp
·         Salt - to taste 
Preparation time: 20 - 25 mins

Procedure:
  • 1.        Lightly roast peanuts (just until you get a nice aroma from the peanuts). Powder the peanuts in a blender. Let the powder be a little coarse (Its nice to bite into pieces of peanuts mixed in the gravy!).
  • 2.         Chop onions, green chillies and cilantro. Mix all of these in a blender along with grated coconut, jaggery and tamarind. (Add tomatoes if you are using them instead of tamarind). To this add curry powder and peanut powder and give a good mix.
  • 3.        Wash the eggplants and cut each of them in the shape of a Plus(+). Make sure you do not cut the eggplant completely. Save the eggplants in a bowl of water with a pinch of turmeric (this way they will not turn black).
  • 4.        Stuff the above mixture carefully in the eggplants and keep aside. Save the rest of the mixture to be used for the gravy.
  • 5.        In a pan, add 3-4 tbsp of vegetable oil. Once oil is hot add mustard seeds and let it splutter. Add a pinch of turmeric and a few cloves of garlic.
  • 6.        Carefully drop the stuffed eggplants into the oil. After 1-2 mins, give the eggplants a turn.
  • 7.        Sprinkle some water and cover the pan to let the eggplants cook for about 5-6 mins. Check regularly and turn over the eggplants once or twice.
  • 8.        Once the eggplants are cooked (you can check by poking a fork), add the rest of the mixture and water to get the required consistency. Add salt as required.
  • 9.        Cover the pan and cook for about 5-6 mins.
  • 10.      Once cooked, transfer the contents to a serving bowl and garnish with some chopped cilantro.

Serve with:
 Badnekayi Yennegayi can be served with roti/chapathi, akki rotti, bhaakri/jolada rotti and also rice. A few pieces of raw onion can be served along with this.

Wednesday, July 3, 2013

Eggless Blackforest cake


Black Forest cake always reminds of my college days. Bunking classes with friends and going to Ice Thunder (sadly it's closed now :( ) just to have a slice of our favorite Black Forest cake...those days were so much fun! Now since each of us is in different a continent its so difficult to even meet! So, I just wanted to try making this at home. It did come out quite well for a beginner. I put up the picture on Facebook and that's the only way I could share it with my friends. 

Black Forest cake basically contains several layers of chocolate cake with whipped cream and cherries between each layer. One can always incorporate several other things like chocolate chips, nuts etc and give it a new twist. Here, I have made a Black Forest cake, which is eggless, with two layers covered with whipped cream and cherries. I finally decorated the cake with whipped cream, chocolate shavings and cherries. I think its the combination of the cherries, chocolate and whipped cream that is simply heavenly!


Ingredients :
·         Maida (All purpose flour) - 2 cups
·         Cocoa powder - 3-4 tbsp (I used Hershey's)
·         Baking Powder - 1-2 tsp
·         Baking Soda - 1 tsp
·         Sugar - 1 cup
·         Milk - 1 cup (Milk should be at room temperature)
·         Butter - 125gm
·         Any Aerated drink/cola - 200 ml
·         Whipped cream -250 gm
·         Cherries - 1 can
·         Oil - for greasing the baking tin
·         Salt - a pinch
·         Vanilla essence - a few drops
·         Dark Chocolate - 1 bar
·         A Baking tin

Preparation time :
 15-20 mins + Baking time of about 30-40 mins

Method :
  • 1.        Preheat the baking oven to 325 degree Farenheit or 150 degree Celsius.
  • 2.        Grease the baking tin on all sides with oil (you can also use the cooking oil spray).
  • 3.        Sift the maida, cocoa, baking powder and baking soda in a large mixing bowl. Add salt.
  • 4.        In a bowl, add milk and sugar, mix well. Melt butter and add it to the milk and mix thoroughly.
  • 5.        Add the above mixture and cola alternatively to the maida mixture along with constant mixing. Make sure the batter is smooth and there are no lumps.
  • 6.        When the batter is ready, pour it evenly into the baking tin. Make sure the baking tin is only half-filled with batter. If you have extra batter left, you can pour it into another tin.
  • 7.        Place the filled tin(s) in the oven(preferably in the middle rack so it bakes evenly) at the same temperature for about 25 - 30 mins. Carefully insert a toothpick into the cake to see if its done. If the toothpick comes out clean, the cake is ready. Take it out of the oven and place it on a cooking rack.
  • 8.        Cut the cake horizontally into 2 halves. Place one half on the plate and coat it generously with whipped cream and cherries. Place the other half on top of this and coat with whipped cream on the sides and top. Arrange cherries on the top as desired. Sprinkle dark chocolate shavings on the top.
  • 9.        Refrigerate for a few hours before you serve.